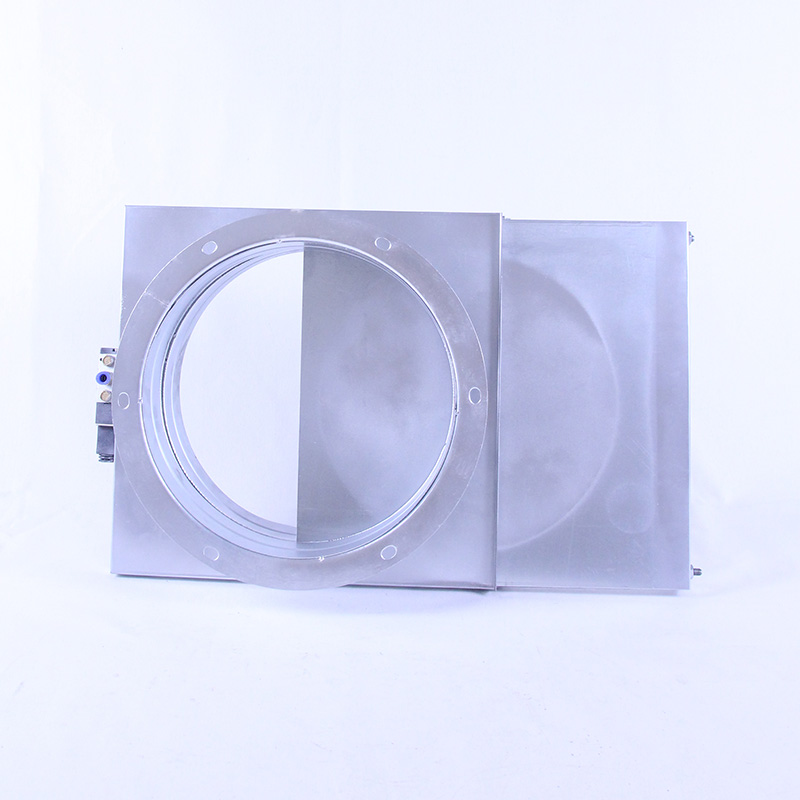
Airflow balancing is one of those details that separates a comfortable building from a constantly complaining one. At the heart of every balancing job sits the volume damper — a deceptively simple device that, when specified correctly, gives you precise control over how much air goes where. Get it wrong, and you'll chase complaints for years.
This guide walks through the engineering decisions that actually matter: blade type, actuator selection, sealing requirements, and the installation details that most datasheets conveniently skip.
How a Volume Damper Actually Works
A
volume damper restricts or opens a duct cross-section using one or more blades that rotate on a pivot axis. The blade angle determines the effective flow area. In a fully open position, the blades align parallel to the airflow; in the closed position, they block the duct entirely.
The relationship between blade angle and flow rate isn't linear. In the first 20–30° of travel, you might see only a 10–15% change in flow. Past 60°, each additional degree produces a dramatic drop. This non-linear characteristic is exactly why precision matters — and why the blade configuration you choose has a direct impact on controllability.
Opposed Blade vs. Parallel Blade: Which One and When
Opposed Blade Dampers
In an opposed blade configuration, adjacent blades rotate in opposite directions. As one blade opens, the next one closes toward the airflow. This creates a more linear flow characteristic — meaning each degree of handle rotation produces a roughly proportional change in airflow.
When to use: Opposed blade dampers are the standard choice for balancing and modulation. If you need to throttle airflow to a specific setpoint — say, maintaining 2,500 CFM in a branch duct — opposed blades give you the resolution to do it without overshooting.
Typical applications include VAV inlet devices, outdoor air intake control, and return air balancing in commercial HVAC systems.
Parallel Blade Dampers
All blades rotate in the same direction. When the damper moves from open to closed, the flow characteristic is steeper — you get a rapid drop in airflow during the final 20° of travel.
When to use: Parallel blade dampers work well as two-position devices (fully open or fully closed). They're common in smoke control systems, emergency exhaust isolation, and fan inlet box shut-offs where you don't need modulation.
Using a parallel blade damper for continuous modulation is possible, but you'll find the sweet spot is narrow and hard to hold.
Manual vs. Motorized vs. Pneumatic Actuation
Manual Volume Dampers
A manual damper uses a handle, lever, or handwheel connected directly to the blade axle. The operator adjusts the blade angle by hand, then locks it in position with a friction clip or set screw.
• Operating range: DN50–DN300 typical, up to 300°C for high-temp variants
• Best for: Systems that are commissioned once and rarely adjusted — warehouses, simple exhaust setups, residential ventilation branches
• Limitation: No remote or automated control. Commissioning requires physical access to each damper
Handle-type dampers suit smaller ducts (up to about 400mm). Handwheel types are preferred for larger diameters where the torque needed to hold position against airflow pressure becomes significant.
Electric (Motorized) Volume Dampers
An electric actuator replaces the manual handle. A motor drives a gear train that rotates the blade assembly. Control signals — typically 0–10V, 4–20mA, or on/off — determine the blade position.
• Voltage options: DC 24V (most common in commercial HVAC), AC 220V (industrial)
• Response time: 60–120 seconds for full stroke, depending on actuator size
• Feedback: Most units include passive signal feedback for position confirmation
• Best for: Automated BAS/BMS integration, zones with variable occupancy, cleanrooms, and any system requiring scheduled or sensor-driven adjustments
The key advantage is integration. A motorized volume damper connected to a building automation system can adjust airflow in response to CO₂ levels, room temperature, or occupancy schedules — no technician with a screwdriver required.
Pneumatic Volume Dampers
Pneumatic actuators use compressed air (typically 20–100 kPa signal pressure) to move the blades. They're intrinsically safe — no electrical sparks — which makes them the default in hazardous environments: paint booths, chemical processing areas, grain silos with explosive dust.
The trade-off is infrastructure. You need a clean, dry compressed air supply and dedicated tubing runs to each damper. In facilities without existing pneumatic systems, the installation cost usually tips the decision toward electric actuators.
Sealing Classes and Leakage Rates
Not all volume dampers seal equally. SMACNA and EN 1751 define leakage classes:
• Class A: ≤ 4 L/s per m² at 1,000 Pa — suitable for smoke control and isolation applications
• Class B: ≤ 20 L/s per m² at 1,000 Pa — standard for most commercial HVAC
• Class C: ≤ 50 L/s per m² at 1,000 Pa — acceptable for general ventilation where tight shut-off isn't critical
Blade edge seals matter. Extruded silicone or EPDM blade seals improve leakage ratings significantly. For applications requiring near-zero leakage (fume hoods, laboratory exhaust), look for dampers with inflatable blade seals or double-blade configurations.
Installation Direction and Orientation
A volume damper's performance depends on correct installation. A few rules that save headaches on site:
1. Follow the airflow arrow. Most dampers are marked with a directional arrow on the frame. Installing backward changes the flow characteristic and can cause blade flutter at certain angles.
2. Maintain straight duct runs upstream and downstream. Elbows or transitions within 2 duct diameters of the damper create uneven velocity profiles that skew the flow characteristic. If space is tight, install flow-straightening vanes.
3. Horizontal vs. vertical shaft. For rectangular dampers over 600mm wide, a vertical shaft arrangement reduces blade sag under its own weight. Horizontal shafts work fine for ducts under 600mm.
4. Insulated dampers for conditioned spaces. If the duct carries conditioned air through unconditioned spaces, specify an insulated damper body (typically 25–50mm polystyrene or mineral wool wrap). This prevents condensation on the damper frame and reduces thermal bridging.
5. Access for maintenance. Always leave clearance on the actuator side. A motorized damper buried against a ceiling with no access panel is a maintenance nightmare when the actuator fails.
Application Scenarios
Commercial HVAC Air Balancing
In a typical office building, each VAV box has an opposed blade volume damper at the inlet. The damper sets the maximum airflow during commissioning, and the VAV controller handles real-time modulation. Getting the initial balance right means fewer call-backs and less energy waste from over-pressurized zones.
Kitchen Exhaust and Make-Up Air
Restaurant kitchen exhaust systems need volume dampers at each hood branch to balance capture velocities. A parallel blade damper at the fan inlet provides on/off isolation for fire safety, while opposed blade dampers at each hood branch handle the balancing.
Industrial Process Ventilation
In welding shops, grinding stations, and chemical fume extraction, volume dampers control capture velocity at each source. Manual dampers work where the process layout doesn't change frequently. Motorized dampers make sense when different workstations operate on different schedules — there's no point in running the exhaust fan at full speed for three active stations when the system was designed for twelve.
Smoke Control Systems
Stairwell pressurization and smoke exhaust systems use volume dampers rated for high-temperature operation (280°C for 1–2 hours). These dampers must meet specific leakage ratings and are typically UL 555S listed. The actuators must be fail-safe — spring-return to the defined position on power loss.
Airflow Measurement and Commissioning
Once dampers are installed, the commissioning process determines whether the system actually delivers design airflow to each zone. The standard approach uses a calibrated airflow measuring station or a traverse measurement in the duct upstream or downstream of the damper.
For opposed blade dampers used as balancing devices, the commissioning agent sets the damper to the position that delivers the design airflow (measured by the traverse or balancing instrument), then locks the handle or marks the actuator position. This is a one-time set — the BAS handles ongoing modulation from that point forward.
A common mistake during commissioning: adjusting multiple dampers simultaneously without accounting for system interaction. Changing one branch damper affects the static pressure in the main trunk, which shifts airflow in every other branch. The correct sequence is to start with all dampers fully open, identify the branch with the lowest percentage of design airflow (the "critic" branch), and work outward — adjusting the closest branches last.
Maintenance Intervals
Volume dampers are low-maintenance devices, but they aren't maintenance-free. A reasonable schedule:
• Annual: Verify full stroke operation, check for blade binding, inspect seal condition
• 3-year: Lubricate pivot bearings (if not sealed-for-life), check actuator mounting bolts, test feedback signals
• 5-year: Replace blade edge seals if leakage has degraded beyond acceptable limits
In corrosive environments (coastal installations, chemical plants, swimming pool natatoriums), cut inspection intervals in half. Chloride-laden air attacks blade edges and pivot points faster than you'd expect.
Specifying a Volume Damper: Quick Checklist
When writing a spec or selecting from a catalog, confirm these parameters:
• Duct dimensions and shape (rectangular, circular, square)
• Required flow range (max CFM and minimum throttling position)
• Blade type (opposed for modulation, parallel for two-position)
• Leakage class (A, B, or C per project requirements)
• Actuator type and control signal
• Temperature range of the airstream
• Insulation requirement
• Access and maintenance clearance
 +85247166614



 Current
location:Home >news
>Industry news
>Volume Damper Selection Guide: Blade Configurations, Actuator Matching, And Field Tuning For HVAC Systems
Current
location:Home >news
>Industry news
>Volume Damper Selection Guide: Blade Configurations, Actuator Matching, And Field Tuning For HVAC Systems